


Mastodon 安装与使用
什么是 Mastodon?
Mastodon 是一个微博系统。支持 ActivityPub 协议,因此可以实现不同实例间的相互交流,构成联邦宇宙“Fediverse”。
特别是在 X(前推特)巨变之后,有大批用户涌向 Mastodon,使 Mastodon 的热度不断上升。
官网:点我(注:官网在国内是被墙的状态)
安装 Mastodon
Mastodon 官方推荐 Docker 的安装方式,我们这里就拿 Docker 来安装。
注意现在 Docker 官网在国内是被墙的状态,所以下列操作需要在海外服务器上进行。
以 Ubuntu 22.04 为例,由于自带的只有docker.io,没有原版docker,因此需要自己手动配置 Docker 安装源。
先卸载其他版本的非官方 Docker:
for pkg in docker.io docker-doc docker-compose docker-compose-v2 podman-docker containerd runc; do sudo apt-get remove $pkg; done卸载好之后配置安装源:
# Add Docker's official GPG key:
sudo apt-get update
sudo apt-get install ca-certificates curl
sudo install -m 0755 -d /etc/apt/keyrings
sudo curl -fsSL https://download.docker.com/linux/ubuntu/gpg -o /etc/apt/keyrings/docker.asc
sudo chmod a+r /etc/apt/keyrings/docker.asc

# Add the repository to Apt sources:
echo \
  "deb [arch=$(dpkg --print-architecture) signed-by=/etc/apt/keyrings/docker.asc] https://download.docker.com/linux/ubuntu \
  $(. /etc/os-release && echo "${UBUNTU_CODENAME:-$VERSION_CODENAME}") stable" | \
  sudo tee /etc/apt/sources.list.d/docker.list > /dev/null
sudo apt-get update
接着就可以开始安装:
sudo apt-get install docker-ce docker-ce-cli containerd.io docker-buildx-plugin docker-compose-plugin至此 Docker 安装完成。
克隆 Mastodon 仓库
注意:以下所有操作都要在 root 账户下进行!
先确保服务器上有git,然后克隆仓库:
git clone https://github.com/tootsuite/mastodon
cd mastodon这里网上会有很多教程建议自己编写docker-compose.yml文件;我倒是发现只有自带的那个好使,自己写的不好使。建议根据实际情况选择。
接着拉取镜像:
docker compose build拉取完成后开始配置:
cp .env.production.sample .env.production
docker compose run --rm web rake mastodon:setup
配置过程中会问你一堆问题。
先是会问你要用什么域名,填你自己的域名就行。
Postgres 和 Redis 的部分,由于我们是 Docker 安装,无脑回车就行;连接测试是一定能过的。
问你要不要把文件存储在云端,如果你有对象存储,就选是。我们这里没有,直接选否即可。
发送邮件的部分,这一步很重要,一定不要填错!
由于国内很多服务商会对服务器的发送邮件功能做限制,所以建议使用 SMTP 功能!
所有这些干完之后,会先把配置打印出来,然后问你要不要创建管理员账户。旧版本创建的时候可能会出现问题,新版本已经解决了,至少我没有遇到,因此建议直接创建一个。
至此 Mastodon 应该会提示你“You can power on Mastodon now”(你现在可以启动 Mastodon 了)。
当然不出意外的话就该出意外了。如果你这个时候就跑去用docker compose up -d启动的话,会惊讶的发现mastodon-web-1、mastodon-streaming-1、还有mastodon-sidekiq-1这三个服务一直在重启,无法正常启动!
这里也是 Mastodon 比较迷惑的一个地方:尽管运行配置时要求必须在当前目录下存在一个.env.production文件,但是当你真的配置好后,这个文件却不会自动更新!你要做的就是把刚刚配置程序打印出来的那一大堆配置,复制下来,粘贴到这个文件当中!
接下来先设置一下文件权限:
chown -R 991:991 public然后启动 Mastodon:
docker compose up -d这一次启动就不会有问题了,用docker ps会看到所有容器的状态都是healthy。
配置 Mastodon 反向代理
这里直接参考 Mastodon 官方的配置。官方推荐 nginx 做反代。
map $http_upgrade $connection_upgrade {
  default upgrade;
  ''      close;
}

upstream backend {
    server 127.0.0.1:3000 fail_timeout=0;
}

upstream streaming {
    # Instruct nginx to send connections to the server with the least number of connections
    # to ensure load is distributed evenly.
    least_conn;

    server 127.0.0.1:4000 fail_timeout=0;
    # Uncomment these lines for load-balancing multiple instances of streaming for scaling,
    # this assumes your running the streaming server on ports 4000, 4001, and 4002:
    # server 127.0.0.1:4001 fail_timeout=0;
    # server 127.0.0.1:4002 fail_timeout=0;
}

proxy_cache_path /var/cache/nginx levels=1:2 keys_zone=CACHE:10m inactive=7d max_size=1g;

server {
  listen 80;
  listen [::]:80;
  server_name example.com; # 这一行填你的域名
  root /home/mastodon/live/public; # 根据实际情况填写,你把 Mastodon 克隆到了哪个地方,就填哪个地方,注意最终应该是 public 文件夹
  location /.well-known/acme-challenge/ { allow all; }
  location / { return 301 https://$host$request_uri; }
}

server {
  listen 443 ssl http2;
  listen [::]:443 ssl http2;
  server_name example.com;

  ssl_protocols TLSv1.2 TLSv1.3;

  # You can use https://ssl-config.mozilla.org/ to generate your cipher set.
  # We recommend their "Intermediate" level.
  ssl_ciphers ECDHE-ECDSA-AES128-GCM-SHA256:ECDHE-RSA-AES128-GCM-SHA256:ECDHE-ECDSA-AES256-GCM-SHA384:ECDHE-RSA-AES256-GCM-SHA384:ECDHE-ECDSA-CHACHA20-POLY1305:ECDHE-RSA-CHACHA20-POLY1305:DHE-RSA-AES128-GCM-SHA256:DHE-RSA-AES256-GCM-SHA384:DHE-RSA-CHACHA20-POLY1305;

  ssl_prefer_server_ciphers on;
  ssl_session_cache shared:SSL:10m;
  ssl_session_tickets off;

  # Uncomment these lines once you acquire a certificate:
  # ssl_certificate     /etc/letsencrypt/live/example.com/fullchain.pem; # 证书文件,根据实际情况填写
  # ssl_certificate_key /etc/letsencrypt/live/example.com/privkey.pem;

  keepalive_timeout    70;
  sendfile             on;
  client_max_body_size 99m;

  root /home/mastodon/live/public;

  gzip on;
  gzip_disable "msie6";
  gzip_vary on;
  gzip_proxied any;
  gzip_comp_level 6;
  gzip_buffers 16 8k;
  gzip_http_version 1.1;
  gzip_types text/plain text/css application/json application/javascript text/xml application/xml application/xml+rss text/javascript image/svg+xml image/x-icon;
  gzip_static on;

  location / {
    try_files $uri @proxy;
  }

  # If Docker is used for deployment and Rails serves static files,
  # then needed must replace line `try_files $uri =404;` with `try_files $uri @proxy;`. # 使用 Docker 需要改一下配置,我这里已经改好了。
  location = /sw.js {
    add_header Cache-Control "public, max-age=604800, must-revalidate";
    add_header Strict-Transport-Security "max-age=63072000; includeSubDomains";
    try_files $uri @proxy;
  }

  location ~ ^/assets/ {
    add_header Cache-Control "public, max-age=2419200, must-revalidate";
    add_header Strict-Transport-Security "max-age=63072000; includeSubDomains";
    try_files $uri @proxy;
  }

  location ~ ^/avatars/ {
    add_header Cache-Control "public, max-age=2419200, must-revalidate";
    add_header Strict-Transport-Security "max-age=63072000; includeSubDomains";
    try_files $uri @proxy;
  }

  location ~ ^/emoji/ {
    add_header Cache-Control "public, max-age=2419200, must-revalidate";
    add_header Strict-Transport-Security "max-age=63072000; includeSubDomains";
    try_files $uri @proxy;
  }

  location ~ ^/headers/ {
    add_header Cache-Control "public, max-age=2419200, must-revalidate";
    add_header Strict-Transport-Security "max-age=63072000; includeSubDomains";
    try_files $uri @proxy;
  }

  location ~ ^/packs/ {
    add_header Cache-Control "public, max-age=2419200, must-revalidate";
    add_header Strict-Transport-Security "max-age=63072000; includeSubDomains";
    try_files $uri @proxy;
  }

  location ~ ^/shortcuts/ {
    add_header Cache-Control "public, max-age=2419200, must-revalidate";
    add_header Strict-Transport-Security "max-age=63072000; includeSubDomains";
    try_files $uri @proxy;
  }

  location ~ ^/sounds/ {
    add_header Cache-Control "public, max-age=2419200, must-revalidate";
    add_header Strict-Transport-Security "max-age=63072000; includeSubDomains";
    try_files $uri @proxy;
  }

  location ~ ^/system/ {
    add_header Cache-Control "public, max-age=2419200, immutable";
    add_header Strict-Transport-Security "max-age=63072000; includeSubDomains";
    add_header X-Content-Type-Options nosniff;
    add_header Content-Security-Policy "default-src 'none'; form-action 'none'";
    try_files $uri @proxy;
  }

  location ^~ /api/v1/streaming {
    proxy_set_header Host $host;
    proxy_set_header X-Real-IP $remote_addr;
    proxy_set_header X-Forwarded-For $proxy_add_x_forwarded_for;
    proxy_set_header X-Forwarded-Proto $scheme;
    proxy_set_header Proxy "";

    proxy_pass http://streaming;
    proxy_buffering off;
    proxy_redirect off;
    proxy_http_version 1.1;
    proxy_set_header Upgrade $http_upgrade;
    proxy_set_header Connection $connection_upgrade;

    add_header Strict-Transport-Security "max-age=63072000; includeSubDomains";

    tcp_nodelay on;
  }

  location @proxy {
    proxy_set_header Host $host;
    proxy_set_header X-Real-IP $remote_addr;
    proxy_set_header X-Forwarded-For $proxy_add_x_forwarded_for;
    proxy_set_header X-Forwarded-Proto $scheme;
    proxy_set_header Proxy "";
    proxy_pass_header Server;

    proxy_pass http://backend;
    proxy_buffering on;
    proxy_redirect off;
    proxy_http_version 1.1;
    proxy_set_header Upgrade $http_upgrade;
    proxy_set_header Connection $connection_upgrade;

    proxy_cache CACHE;
    proxy_cache_valid 200 7d;
    proxy_cache_valid 410 24h;
    proxy_cache_use_stale error timeout updating http_500 http_502 http_503 http_504;
    add_header X-Cached $upstream_cache_status;

    tcp_nodelay on;
  }

  error_page 404 500 501 502 503 504 /500.html;
}可以参考这篇文章来获取 SSL 证书。
然后重载一下 nginx:
systemctl reload nginx至此应该就可以访问了!用你的账户登录,然后开始你的 Mastodon 之旅吧!
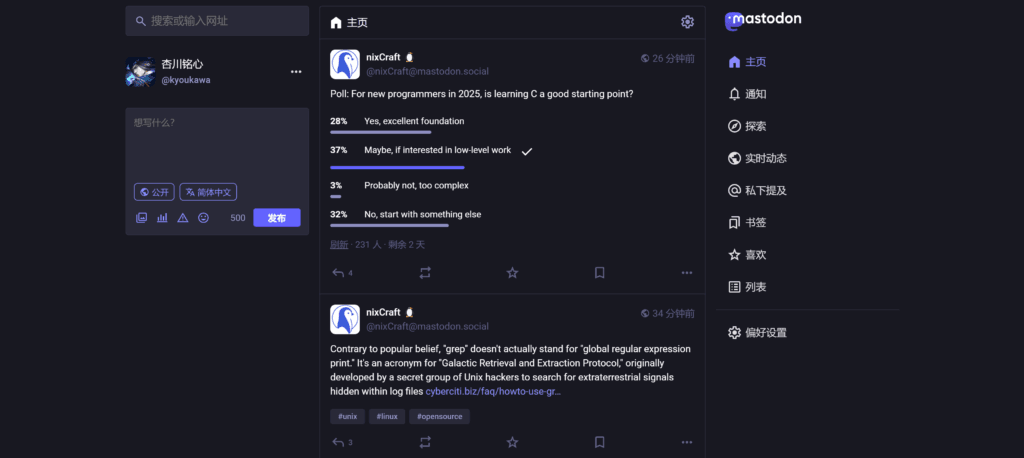
注:我这里是已经用了一段时间的实例,所以可能会不大一样!
另注:如果你是自己建的 Mastodon,那么刚刚登陆的时候是不会有任何账户显示的。推荐先关注 @FediFollows@social.growyourown.services 这个账户(关注方法:在搜索栏里面粘贴 https://social.growyourown.services/@FediFollows/,然后点击“在 Mastodon 中打开”,最后点关注即可),会定期推荐一些可以关注的账号!
封面图源:Mastodon